1. Direct Application via Career Page
Candidates who find and apply to your job openings through your public Career Page will automatically be added to your candidate listing.
2. Added by Workspace Members
Workspace members can manually add candidates into tenant either individually (single add) or in bulk (bulk upload). This method helps you quickly build your candidate pool.
3. Self-Activated Profiles
Members who independently activate their profiles without applying to a specific job will be added to your candidate listing.
4. Career Hub Applications
Career Hub Members who apply via your organization's Career Hub network will also be listed in your candidate database.
The Display settings allow you to customize which columns of information appear in your candidate listing view. You can choose the fields that are most relevant to your review process and hide the rest. This ensures you only see what matters most at each stage of hiring.
On the Candidates page, Display by default that the candidate will include the following information:
Full name
Phone number
Jobs
Stage
Tags
Talent pools
Created at
Last activity
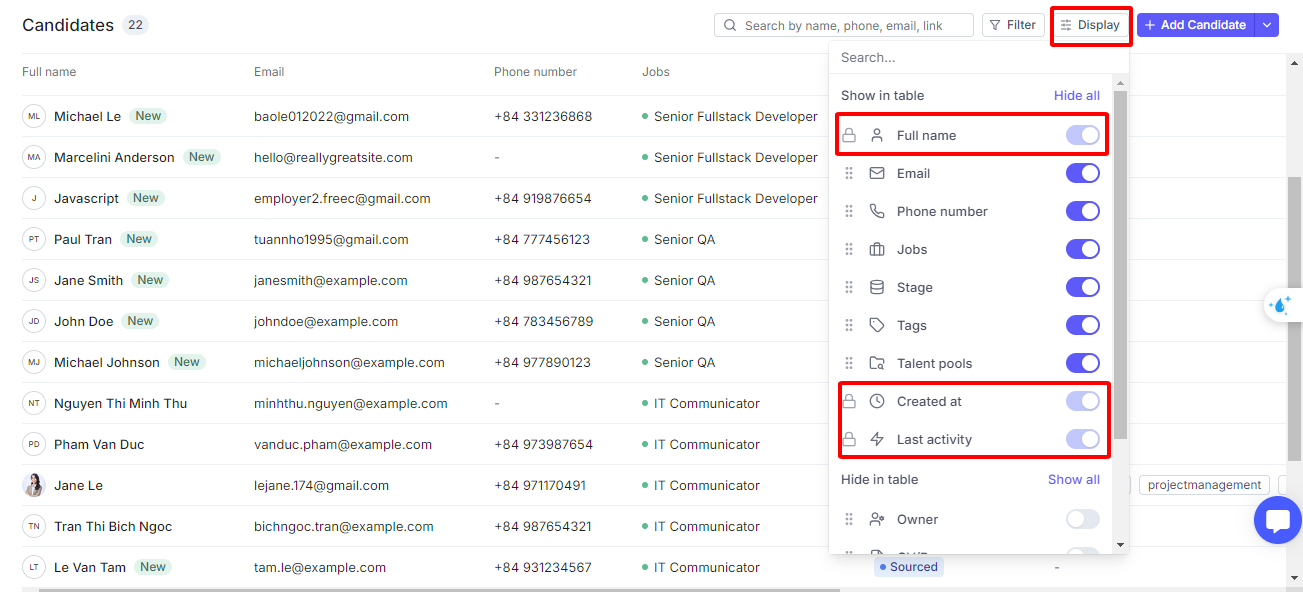
You can adjust the information displayed on the Candidates page as follows:
Click the Display button at the top menu.
Enable the information that you want to display.
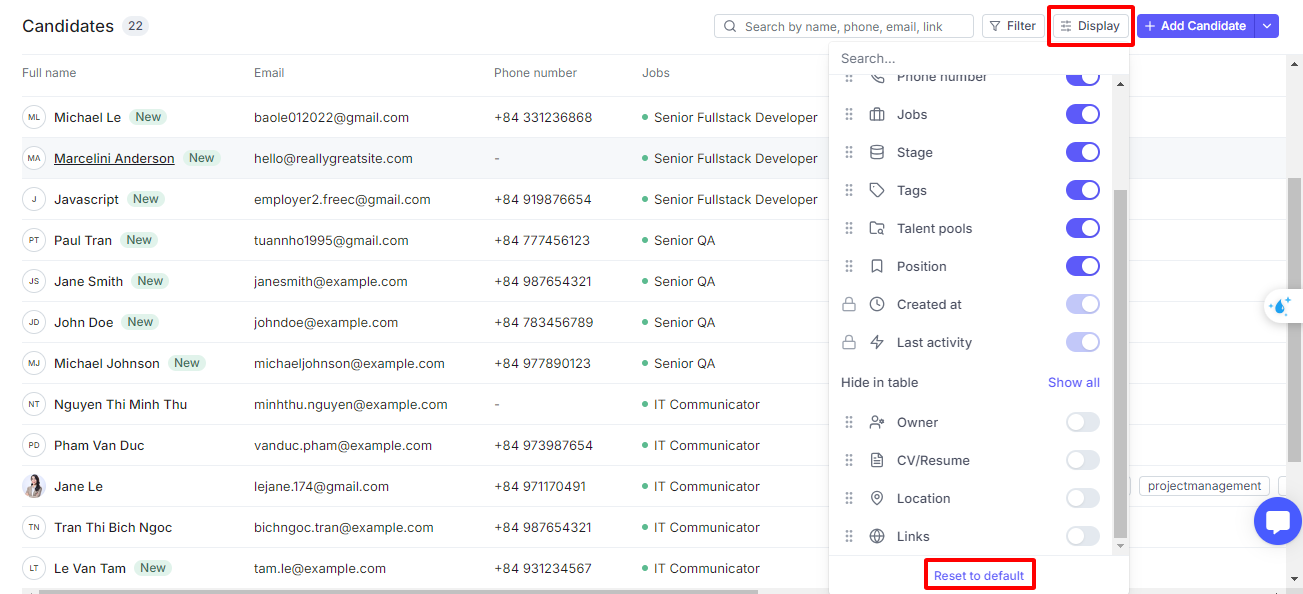
If you want to change the position of the information, you can hold and drag it to the desired position.
If you want to back to default, click Reset to default.
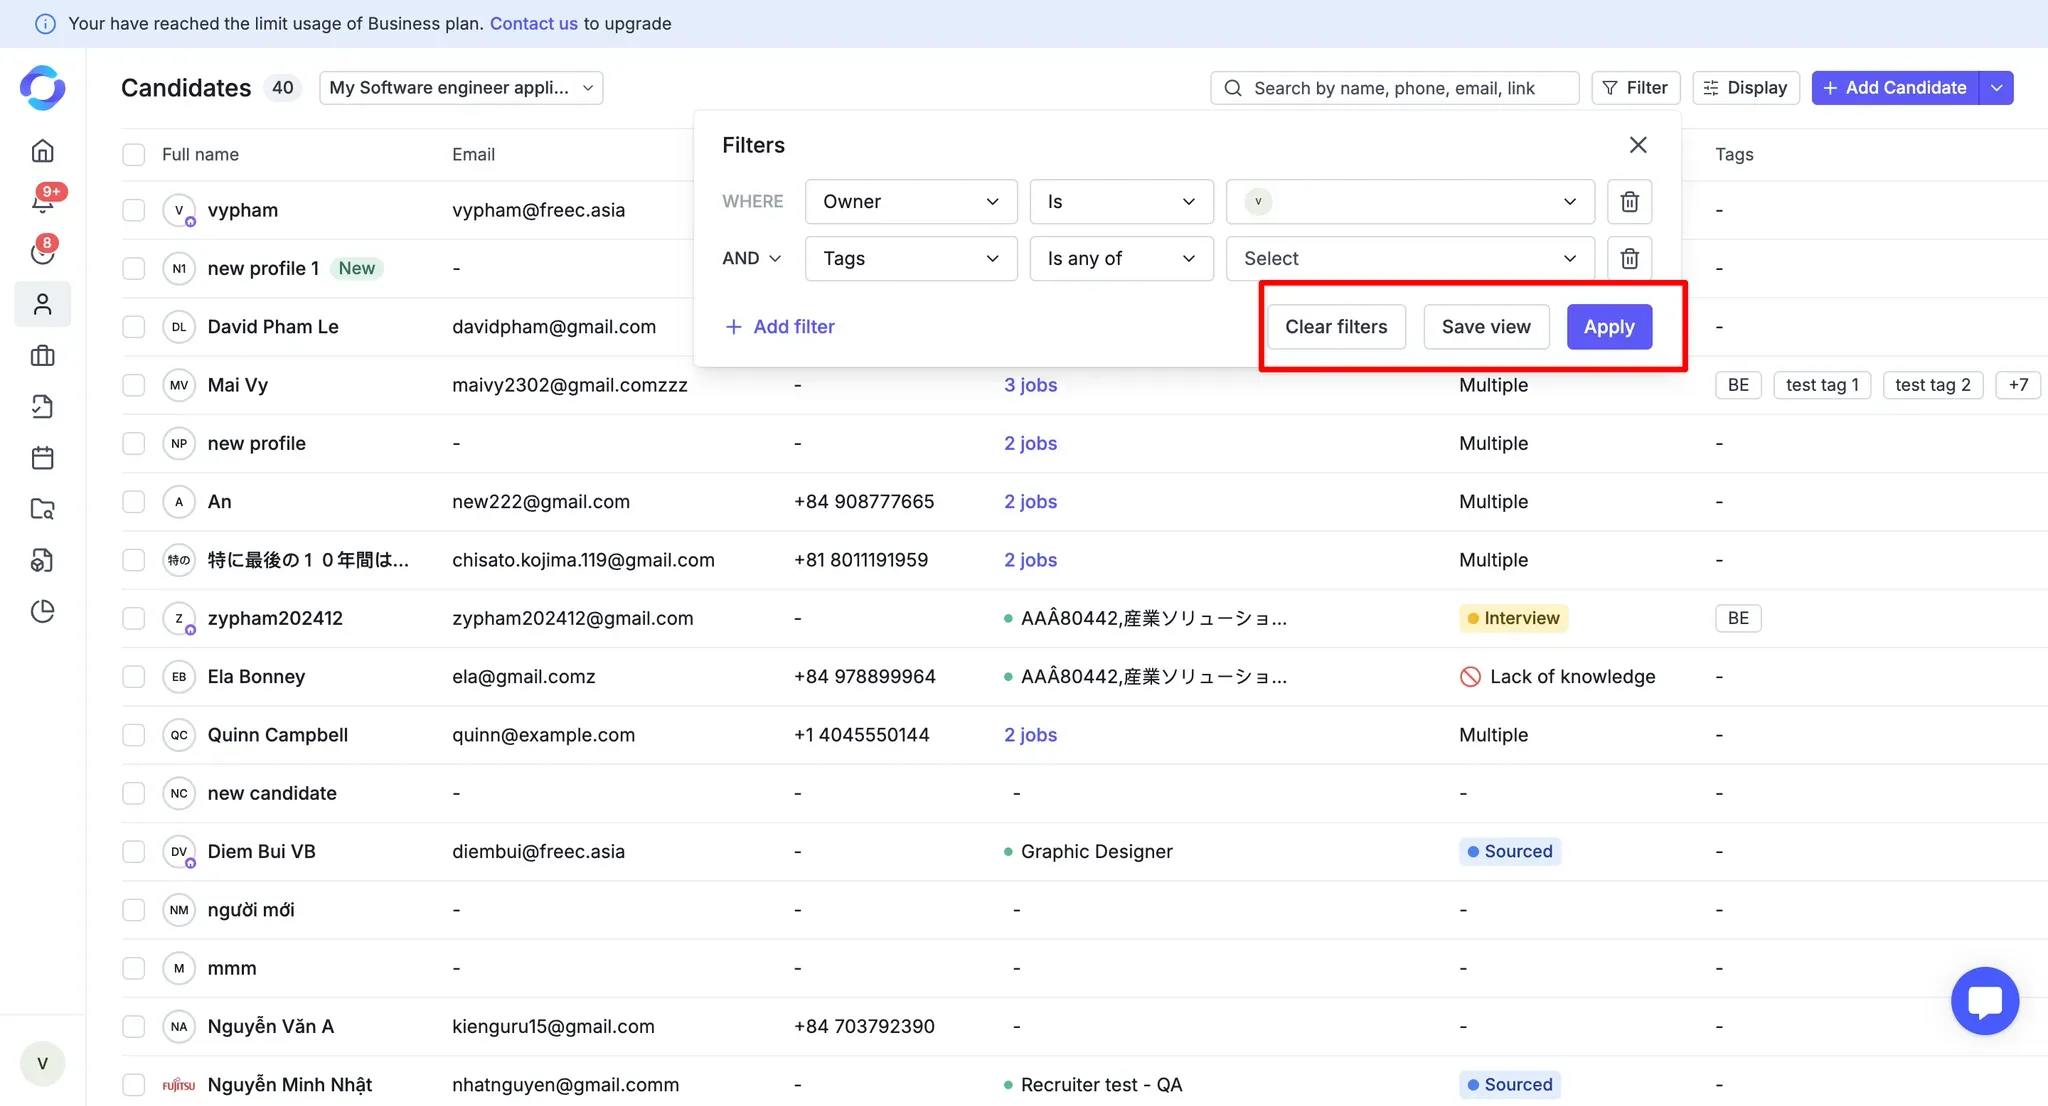
You can filter the candidate on the Candidates page as follows:
Click the Filter button at the top menu.
Choose the object, the condition and the value that you would like to filter.
Combine multiple filters using AND/OR logic. You can combine filters for different objects to find the most suitable results. For example, you can filter candidates by their jobs, experience, and location.
AND Condition (default):
When you apply multiple filters with the AND condition, the results will only show candidates who match all the selected criteria.
OR Condition:
With the OR condition, candidates will appear if they match any of the selected filters, making it easier to broaden your search.
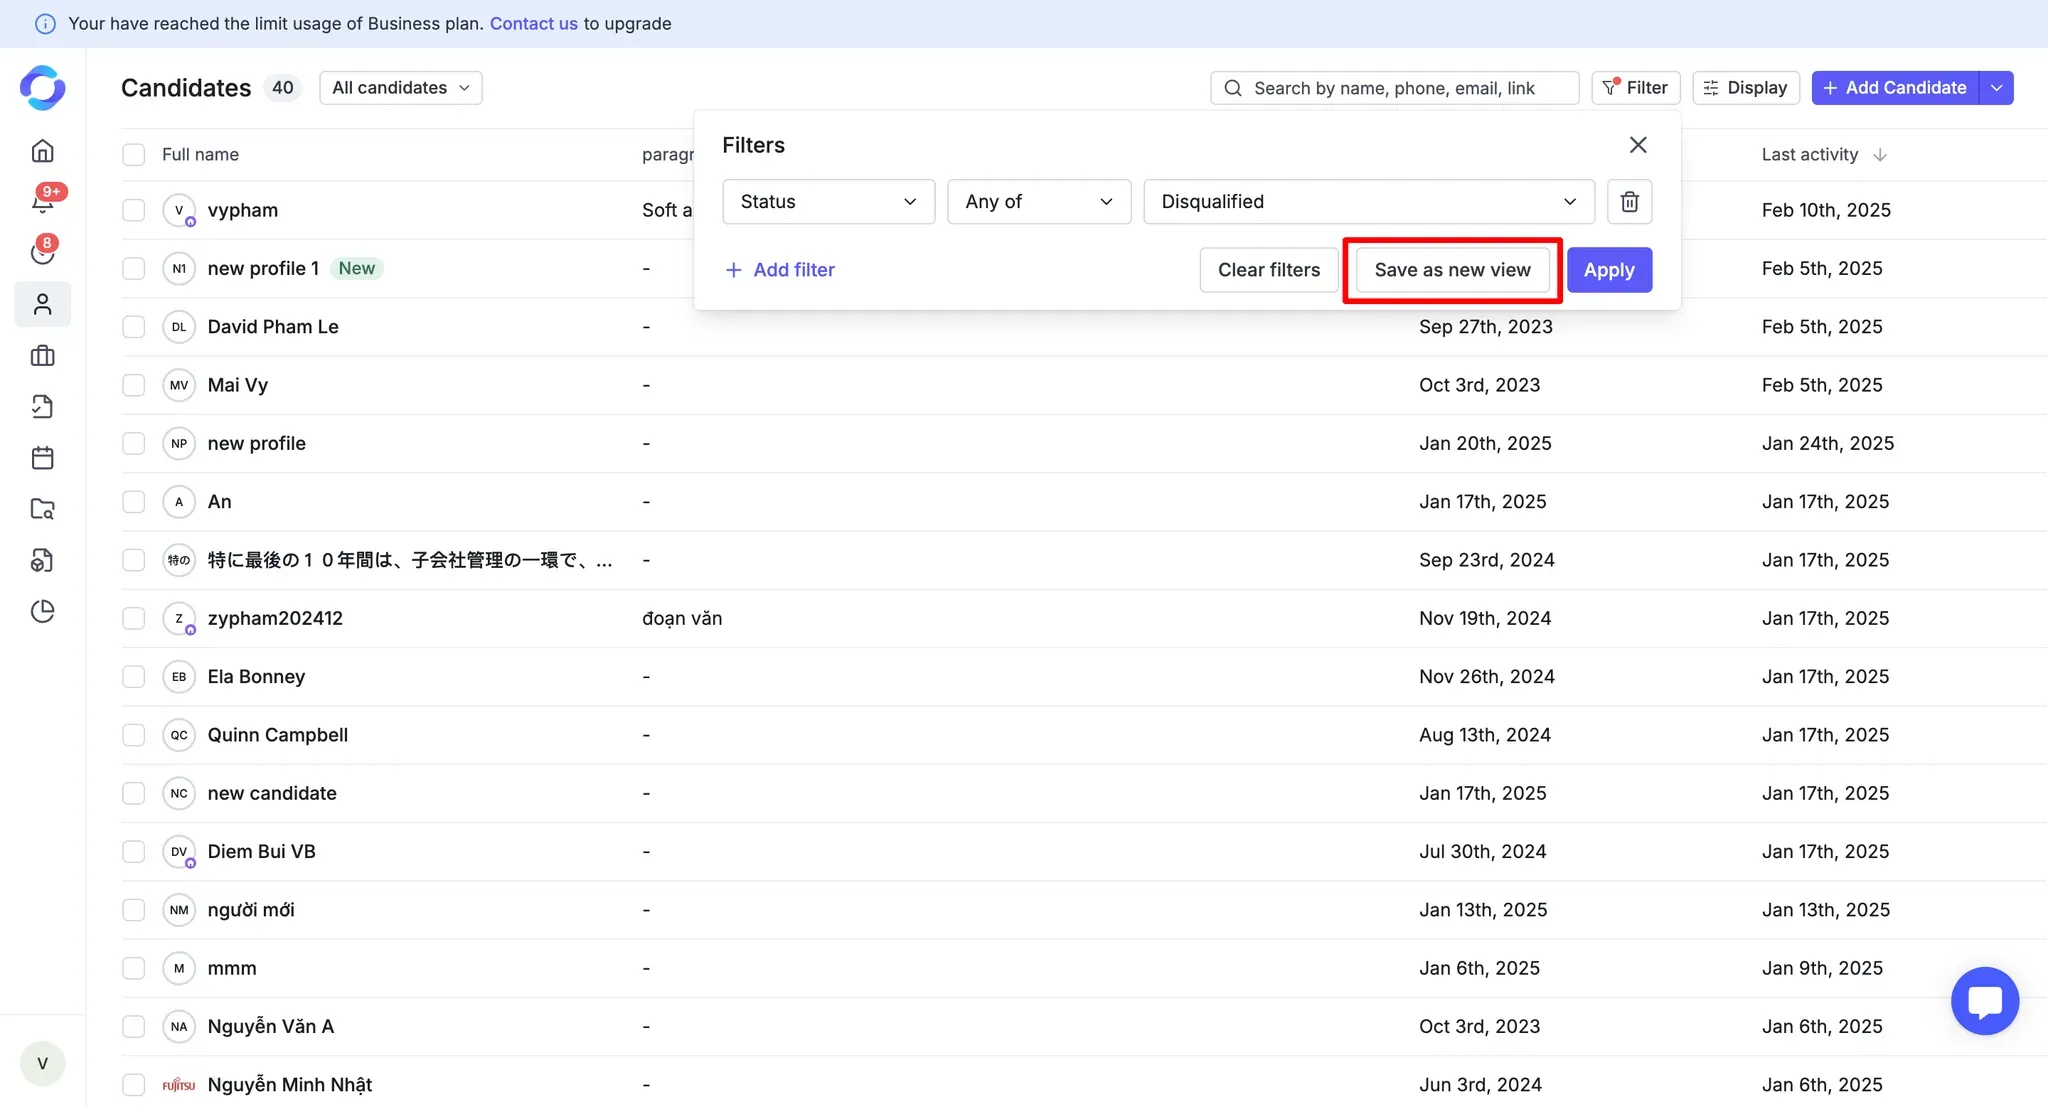
Click the Apply button to apply this filter. If you would like to save frequently used filter sets for future use, click Save as new view.

You can create a new view in two simple ways:
Go to the Candidate Listing.
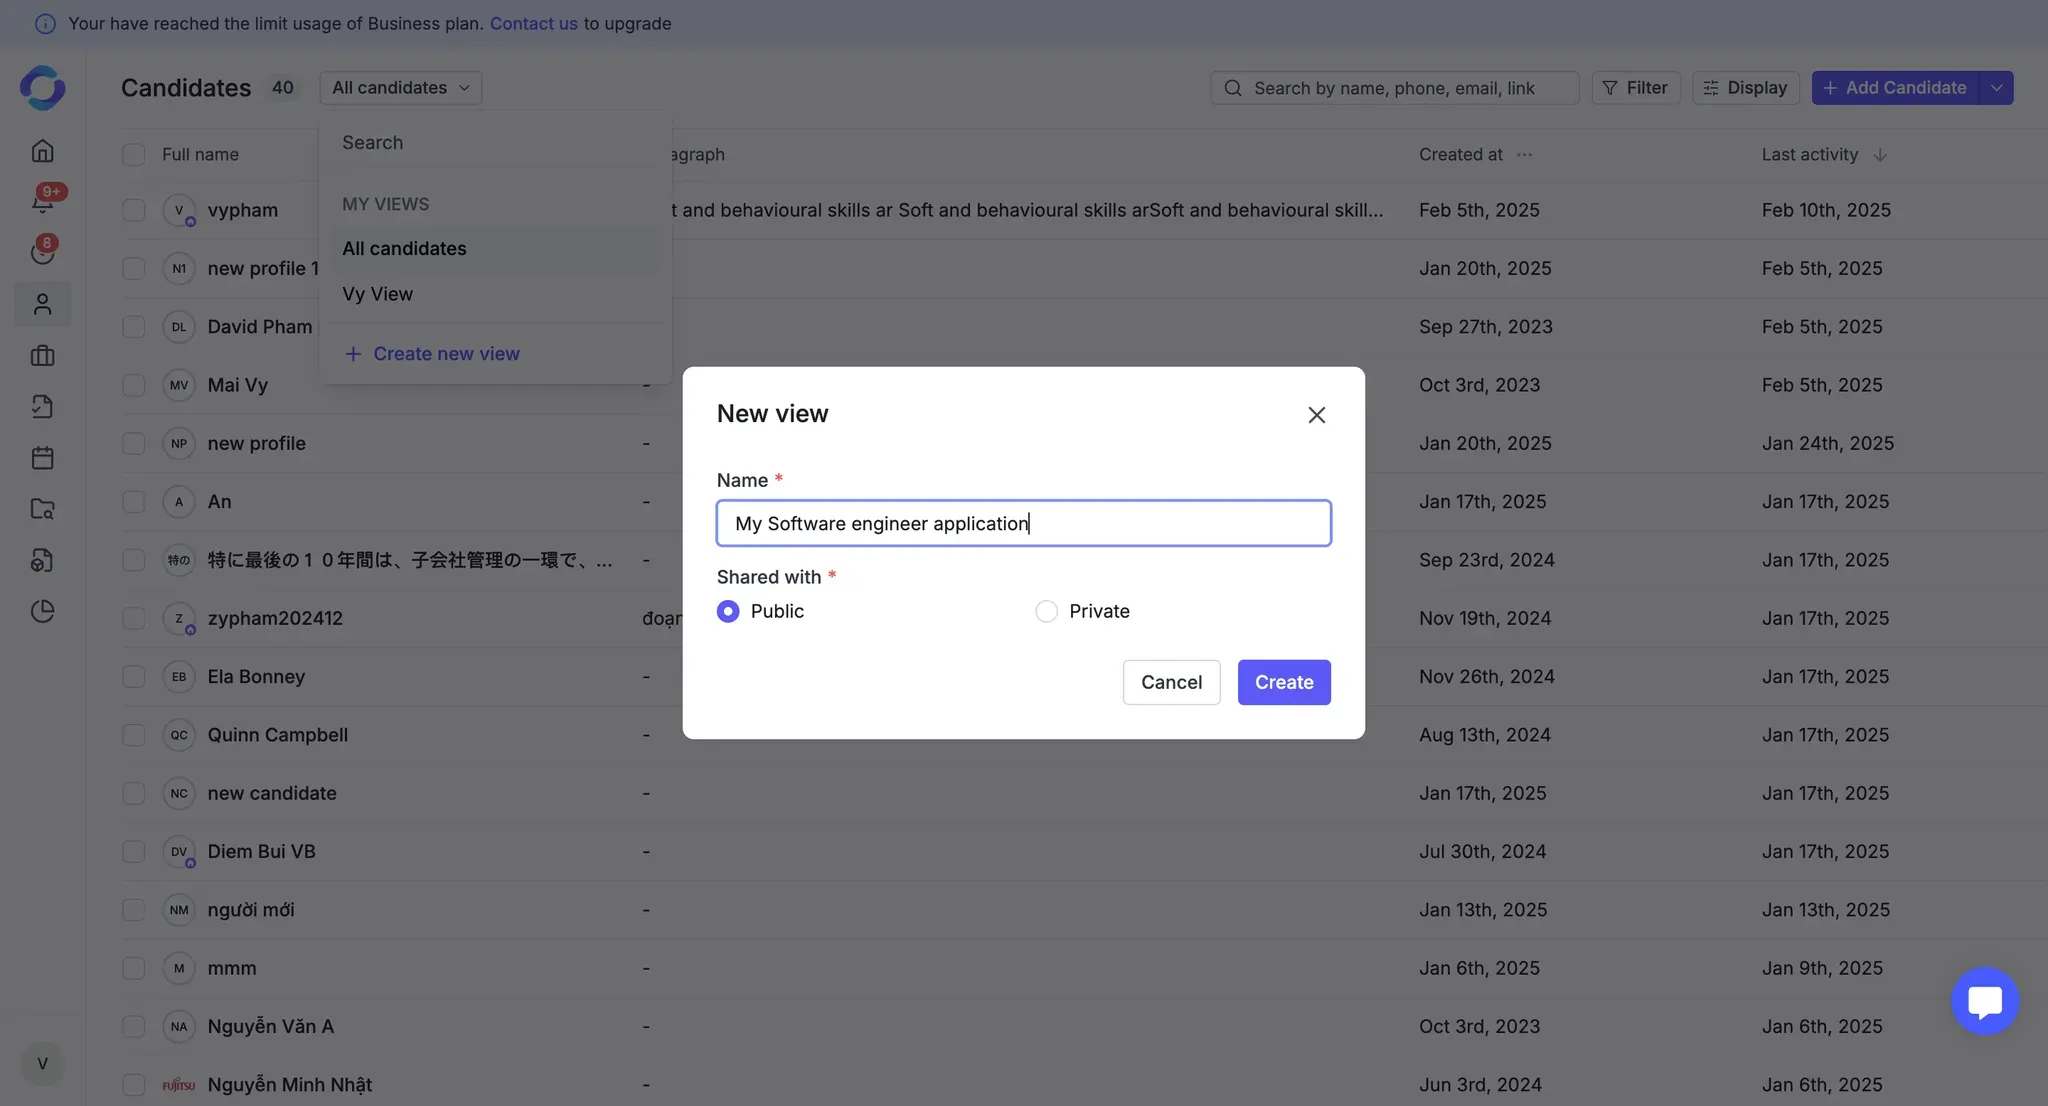
Click the dropdown next to "All Candidates" → Select "Create New View".
Enter a View Name (Required): Max 50 characters.
Select View Visibility (Required):
Public → View is visible to all admins and members.
Private → View is visible only to you.
Click "Save" to create your view.
Once your view is created, the table will display without any filters by default.
You can now customize the view with filters:
Discard: Clear all filters and keep the view without any applied filters.
Apply: Temporarily apply filters without saving them. Filters will reset upon refreshing the page.
Save View: Apply filters and save them to the view. All team members (based on their permissions) will see the same filters when accessing this view.
You can also create a new view based on an existing Public View:
Open the public view you want to duplicate.
Click "Save as New View".
Follow the same steps as in Option 1 to name and set the visibility of your new view.